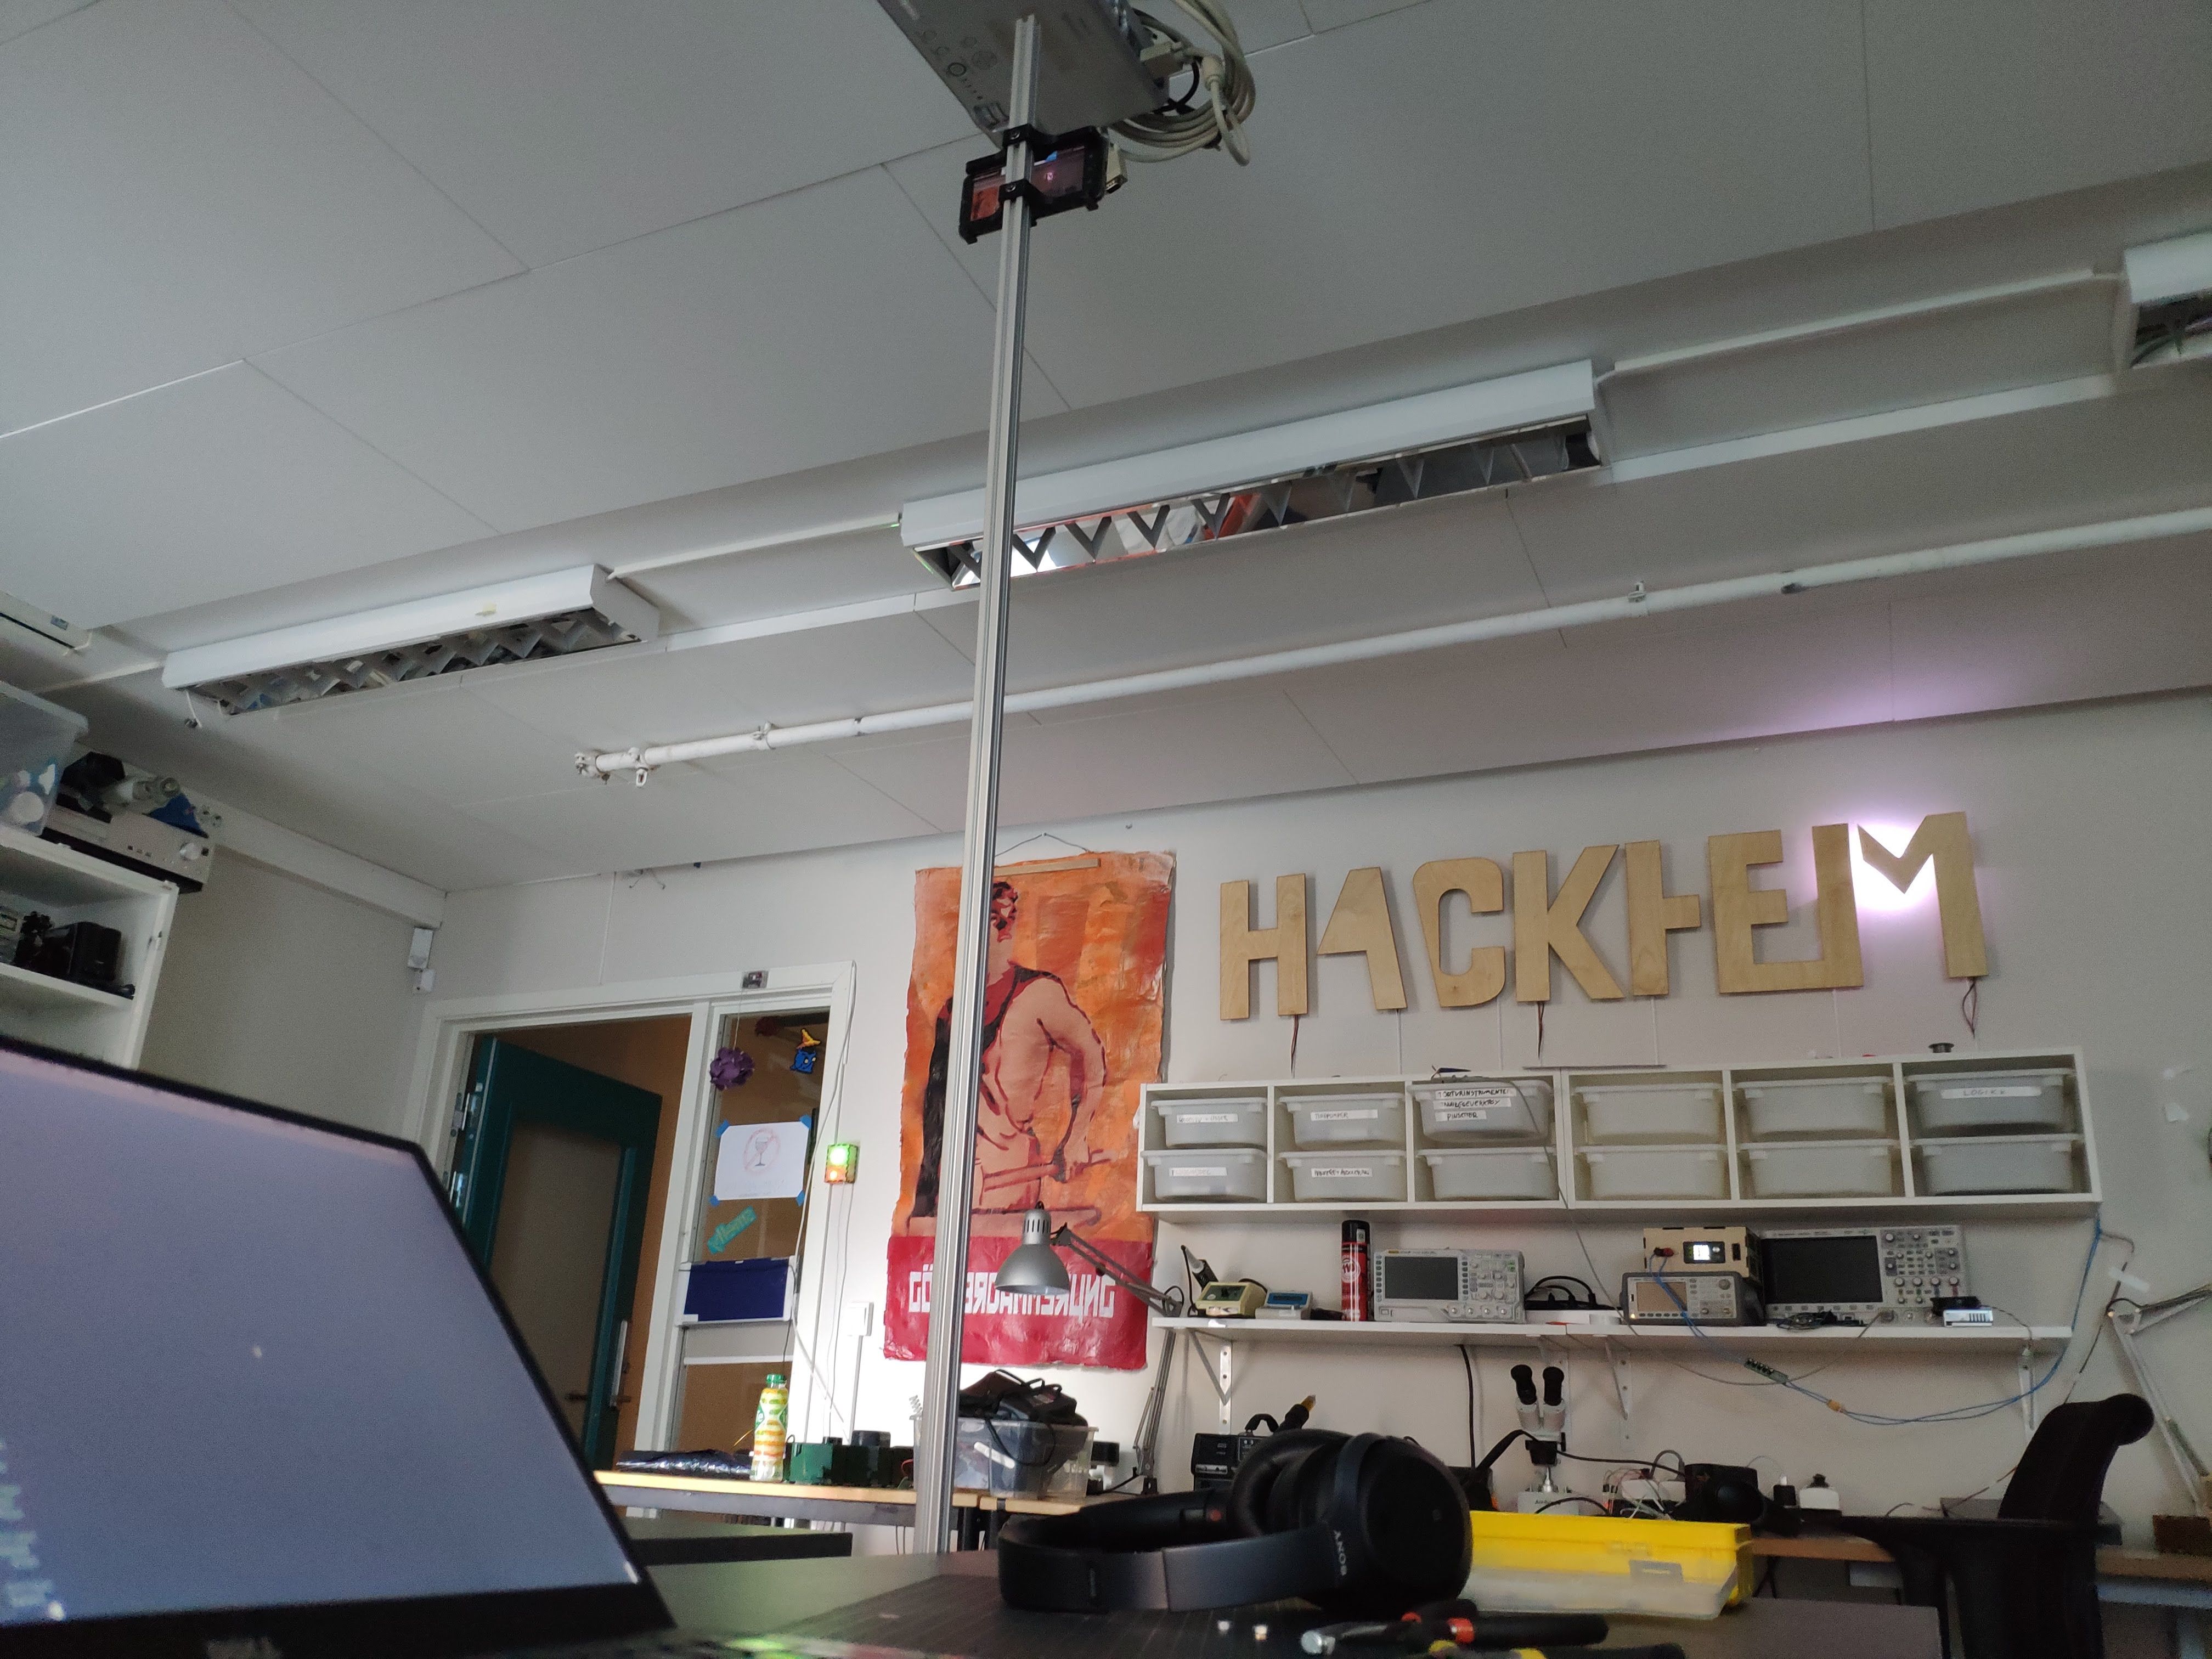
Interactive LED sign at Hackheim
Lately I have been spending some time at the Hackheim hackerspace in Trondheim. Although being located at the back of a bar and arcade is really cool, looking around and seeing projects like the Flaschen Taschen made us feel slightly insecure about our digital signeage situation. Things needed to be set right, and we decided to outdo them.
After thinking it through, we snapped back to reality, and decided to just make a really nice LED-lit sign instead.
Letters #
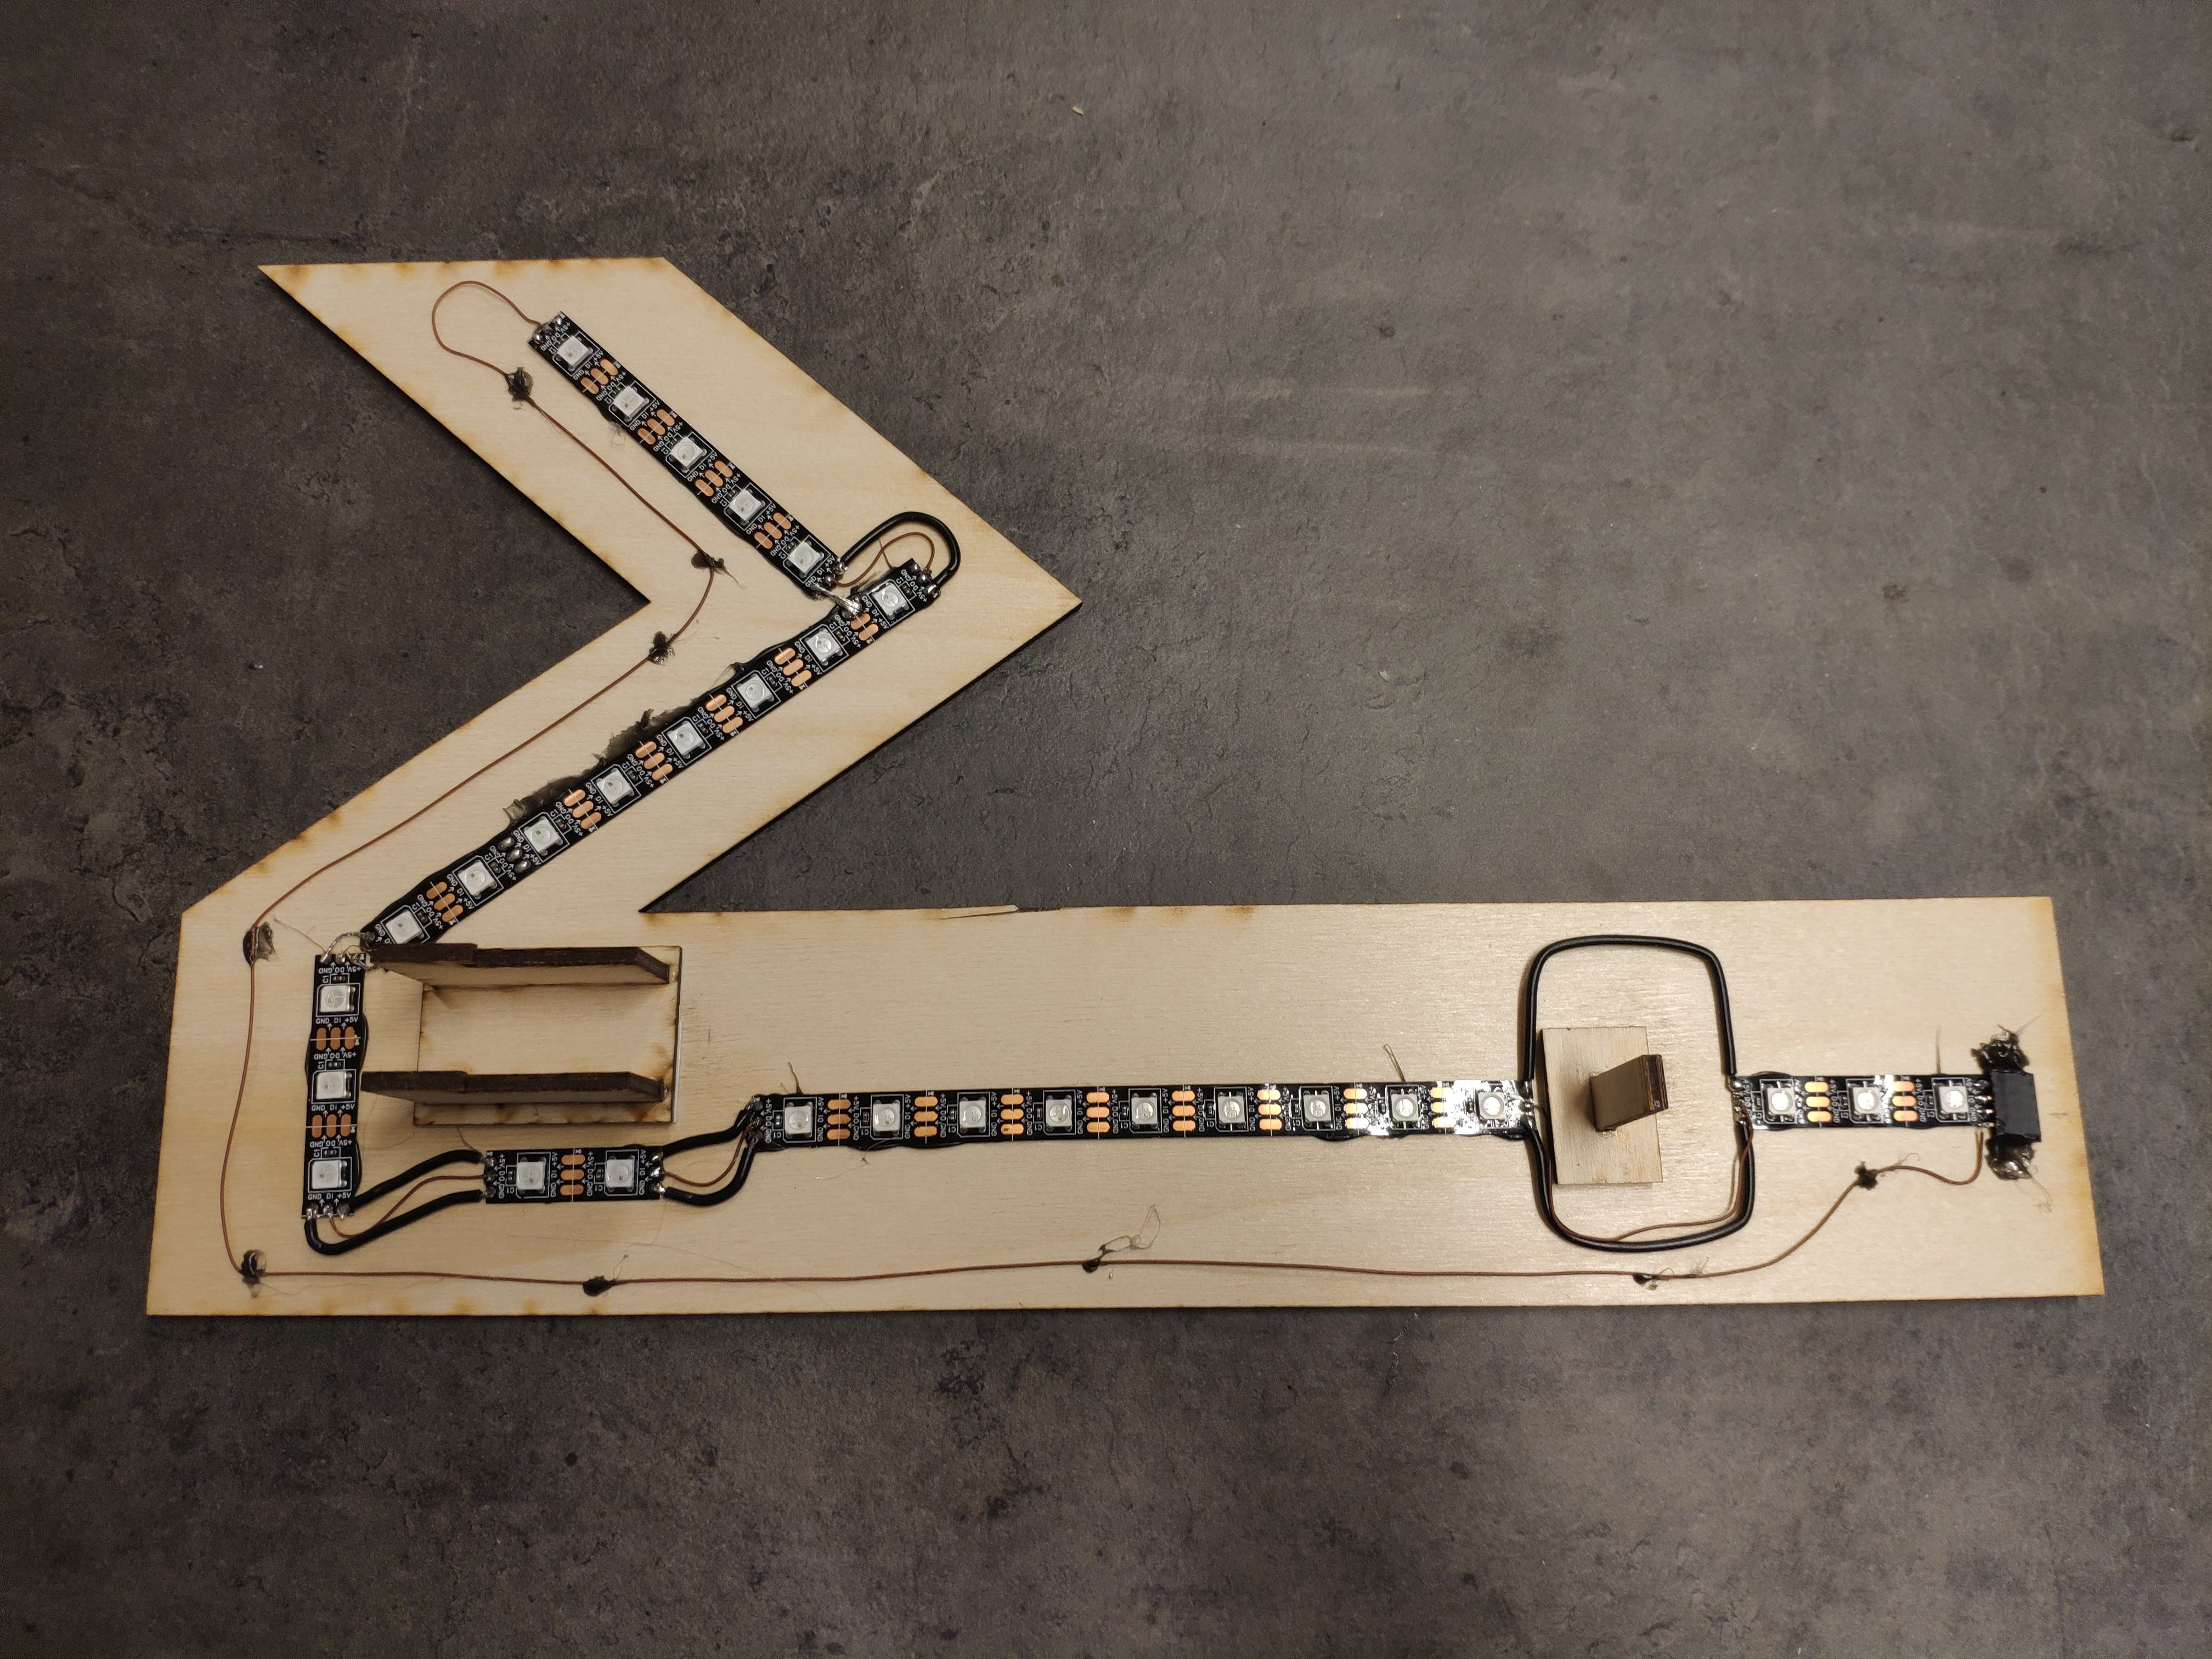
I started out by using our trusty in-house laser cutter to cut out the different letters in the logo, a total of 7 pieces. Each letter ended up with a height of around 37cm, limited by the width of the combined EI piece.
As is tradition, we used WS2812 LED-strips on the back of the letters. Each individual LED in the strip has GND, VCC, Data in and Data out. There is a tiny chip in every LED that enables individual dimming of the RGB channel on all leds in the chain. The downside of this is that the serial data chain has limited speed, so the more LEDs you have in the chain, the longer it takes to update every LED.
To remedy this, and to accomplish silky-smooth update rates, every letter operates on its own individual chain, and data can be pushed to them in parallel.
The letters were initially mounted to the wall using wood blocks and double sided tape. To the dismay of the gypsum wall, I ended up having to pull them down again after a couple of incidents of Bad Planning™. It was decided a more permanent solution was needed. After a brief CAD modelling race between me and the other guy in the room at the time, some easily detachable mounts were designed, fabricated and mounted.
Electronics #
For the controller it was a split between using a Raspberry PI and an ESP32.
Because the sign is mostly going to be remotely controlled, and we would prefer to have as few as possible Raspberry PI linux installs sitting around and bit-rotting, we decided to go with an ESP32. The ESP has more than enough processing power for handling all LED color calculations at a reasonable speed, and has WiFi for connectivity. It also has the very nice RMT pheripheral for sending out color data to the LEDs.
Firmware #
I used ESP-IDF for developing the firmware for the sign. There is a separate FreeRTOS task for writing the data out to the LEDs, rendering and performing color calculations, and doing networking. Because the RMT pheripheral is doing most of the heavy lifting when writing to the LEDs, there is a lot of waiting done in that task. This time is used by both the render task to generate the next frame, and for the networking task to communicate. This results in being able to push out data constantly, no waiting for the next frame to be generated.
Spatial LED position mapping #
Although soups of random color can be nice looking, it would be nice to be able to make smooth gradients on the wall. This is a little bit tricky from the outset since the position of the different LEDs on each chain has nothing to do with its position on the wall.
One solution for this would be manually mapping the position of every LED on the wall. Since the LEDs are mounted facing backwards, and the center of the LED doesn't necesserily map to the center of the light hotpot on the wall, this would be slightly tricky to get 100% right. Oh, and it would also take some time to do.
The solution we went for was to automate the problem. We found an android app which enables snapping a photo through the webcam, and wrote a python script which turns on one LED at a time and snaps a photo. Some OpenCV later, we had the center of the light hotspot of every LED on the sign.
Using the mapping #
The sign is controlled by sending a 6x20 pixel buffer to the sign. The render task on the ESP takes care of sampling the buffer for the four closest pixels, and applying a linear interpolation. This makes it really easy to make smooth transitions and fades.
There is also functionality for fading between colors, in the following example only one update is sent per second.
In addition to the pixel buffer mode, there is also a manual mode for setting data on each LED individually, and more modes will probably be implemented in the future.
Software #
The sign is mainly controlled through an MQTT channel. This makes it really easy for anyone to hack on, and write their own animations and fades. Among other things, there are plans for a simple python library, which makes things easy to set up and work with.
If there are any areas of the build you would like to know more about, please let me know. I am considering writing a more detailed technical post as well.